cases & bags

Tuesday 31 May 2011

How does White Balance work?

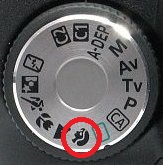
What is White Balance? White Balance is a setting to balance the colour of your picture under different types of light. You can try to shoot in different White Balance setting under the same light source, or shoot in same White Balance setting under different types of light.

1) Auto White Balance (AWB)
- The White Balance is automatically select the best colour reproduction. This is the best setting for normal use.


2) Daylight
- The colour of picture will look like shooting under the midday sun.


3) Shade
- Do you notice the shade actually a bit bluish? Shooting in this mode will remove the bluish when you shoot under the shade.


4) Tungsten Light
- The colour of light bulb, yellow-orange colour cast. This help you to remove the warm colour cast.


5) Cloudy
- Shade and Cloudy are about the same. But Cloudy Mode will add a bit more yellow tinge to compensate for the bluish tinge.


6) Fluorescent Light
- Indoors photo will look slightly greenish because of the fluorescent light. This mode will compensates the greenish colour.


7) Flash
- Flash and Daylight are about the same. But Flash Mode will be slightly bluish. Therefore, it will compensates the bluish as well.


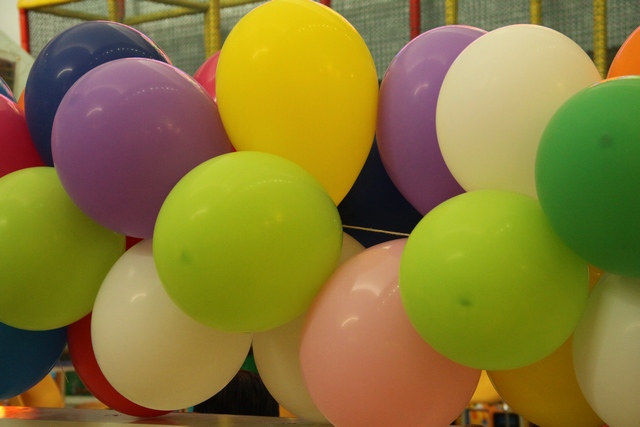
Do you remember the chapter "Understanding the Mood of Picture"? If you want to create Mood in your picture, you need to know White Balance. Auto White Balance is very good most of the time because it makes the pictures have natural look.

However, you can set the White Balance manually to get special colour effects. You will be surprised once you  shoot the same scene with different White Balance Mode. :)


Do you want to know more? Please "like" my posts ^^


Sunday 29 May 2011

How to Use Flash Off Mode?

First, you need to select the Flash-Off Mode at the camera Mode Dial. You might found your Dial looks different, but I'm sure you can find the lightning box icon ( In red circle) at the Dial :)


So, what does Flash-Off Mode do? Let's begin. These are the setting for my camera, but it will be about the same as yours as well. Do not worry ^^

Aperture = Auto
Shutter Speed = Auto
Exposure = Not Available
ISO Speed = Auto
Picture Style = Standard
White Balance = Auto
AF Mode = AI Focus
AF Point Selection = Auto
Drive Mode = One Shot
Metering Mode = Evaluative
Built-in Flash = OFF

Flash-Off Mode is actually Auto Mode without Flash. When do we need to use it? Well, places like aquarium, art museum, or maybe you want to capture the mood and a natural colour under ambient lights,  Flash-Off Mode can help you. 

There is a weakness for SLR camera in Auto Mode. When the environment is too dark, the Built-in flash will automatically pop up and flash rapidly to search the focus. If you close it back, it will pop up again because the Sensor can't get Exposure in a dark environment. It is quite annoying because the flash keeps firing when you don't need it. :)


While in Flash-Off Mode, the background will be brighter instead of the front of the car.


Therefore, Flash-Off Mode is to turn the flash off ONLY, you can still leave it to the camera to decide the best settings for your pictures. Nothing Special, isn't it? 


Do you want to know more? Please "like" my posts ^^

Thursday 26 May 2011

How to Use Night Portrait Mode?

First, you need to select the Night Portrait Mode at the camera Mode Dial. You might found your Dial looks different, but I'm sure you can find the night icon ( In red circle) at the Dial :)


So, what does Night Portrait Mode do? Let's begin. These are the setting for my camera, but it will be about the same as yours as well. Do not worry ^^

Aperture = Auto
Shutter Speed = Auto
Exposure = Not Available
ISO Speed = Auto
Picture Style = Standard
White Balance = Auto
AF Mode = One Shot
AF Point Selection = Auto
Drive Mode = Single
Metering Mode = Evaluative
Built-in Flash = Auto

Do you remember the chapter "How to Use Portrait Mode"? There are 2 settings different between Night Portrait Mode and Portrait Mode. But there are some reason you are suggested to use Night Portrait Mode.

First, the Picture Style is Standard instead of Portrait. You need to capture a healthier and softer skin tone, don't you? As you can see, it is in the Night, the environment is assume in dark scene. Portrait Mode will make the picture lighter and softer, you will have a weird skin tone if you capture in a dark environment. 

Second, the Drive Mode is Single instead of Slow-Speed Continuous. Do you remember the chapter "How does Shutter Work"? This has something to do with the Exposure as well. When you shooting in the dark environment, it is difficult to get enough Exposure. The Shutter Speed probably will slow down in order to get more Exposure. Therefore, you cannot shoot continuous photos because you will capture blur images. 

Third, the Built-in Flash is in Auto. The Flash will fire automatically if the environment is too dark. This also why Slow-Speed Continuous Shutter Speed is not allowed. Flash needs time to charge before firing. There is no way a flash can charge in Continuous Shooting Mode... ...Unless you are in a Studio with more professional equipments.

Fourth, Night Portrait Mode instead of Auto Mode. If you want to capture the subject standing out more from the background, Night Portrait Mode is always the better choice while Auto Mode will only make the the background becomes black.  

However, just leave it to the camera to make a difficult night portrait. If you found the picture still blur, try to use a tripod or find something to steady your camera. 


Do you want to know more? Please "like" my posts ^^

Tuesday 24 May 2011

How to Use Sports Mode?

First, you need to select the Sports Mode at the camera Mode Dial. You might found your Dial looks different, but I'm sure you can find the Athlete icon ( In red circle) at the Dial :)


So, what does Sports Mode do? Let's begin. These are the setting for my camera, but it will be about the same as yours as well. Do not worry ^^

Aperture = Auto
Shutter Speed = Auto
Exposure = Not Available
ISO Speed = Auto
Picture Style = Standard
White Balance = Auto
AF Mode = AI Servo
AF Point Selection = Auto
Drive Mode = High-Speed Continuous
Metering Mode = Evaluative
Built-in Flash = OFF

Sports Mode combines AI Servo and High-Speed Continuous Shutter Speed to freeze the motion of a moving object. With the High-Speed Continuous Shutter Speed, you will able to capture continuous motion so you will not miss any important scenes of a moving object, as well as shooting kids and animals.

Well, if you want to freeze motion, why don't you just increase the shutter speed? Please refer back to "How to Freeze Motion?" .

There are differences between "Increase Shutter Speed to Freeze Motion" and Sports Mode. As you can see,  Portrait Mode, Landscape Mode, Close-Up Mode, Sports Mode and Night Portrait Mode are actually function in Auto Mode (with some changes respectively).  There are Intelligent Software to help the user to capture a better picture.

In Sports Mode, there is a setting ( In red colour of setting list ) called "AI Servo", which is a function automatically focus the moving objects in order to capture continuous motion. The Focus changes to keep the moving target focused when you press the shutter button halfway.


And it is fast enough to make continuous focusing compare with AI Focus in Auto Mode.


Can't see the different? Let's zoom in to the tyre.


As you can see, AI Servo able to focus both rim and ground are sharp and clear, even the vehicle is moving.


This picture shows the rim is blurred but the ground is clear. Although AI Focus in Auto Mode is design for moving object, but not as fast as Sports Mode, the way to Focus is different as well.

Unlike a simple "Freeze Motion", you only focus at one point, hold your breath and wait the moving target moved into your focused point. Once the target away from your focused point, you need to search the focus again or you will not get a clear picture.


Do you want to know more? Please "like" my posts ^^


Check out more DSLR and Gadgets?


Sunday 22 May 2011

How to Use Close-Up Mode?

First, you need to select the Close-Up Mode at the camera Mode Dial. You might found your Dial looks different, but I'm sure you can find the flower icon ( In red circle) at the Dial :)


So, what does Close-Up Mode do? Let's begin. These are the setting for my camera, but it will be about the same as yours as well. Do not worry ^^

Aperture = Auto
Shutter Speed = Auto
Exposure = Not Available
ISO Speed = Auto
Picture Style = Standard
White Balance = Auto
AF Mode = One Shot
AF Point Selection = Auto
Drive Mode = Single
Metering Mode = Evaluative
Built-in Flash = Auto

Do you remember the chapters "How to Use Portrait Mode" and "Controlling the Depth of Field"? In Close-Up Mode, you can't control the Aperture because it is in Auto. But, the camera is designed to use lower f-number Aperture in order to narrow the depth of field and make the background blur.

There are something similar between Portrait Mode and Close-Up Mode because both of these Modes are using a lower f-number to blur the background. So what is the different between these 2 Modes?

Portrait Mode is designed for tuning the skin's tones in order to have a healthier, lighter and softer result. Of course, Portrait Mode colour control will not only target the subject, it target Everything in the picture. The colour of Portrait Mode will be lighter most of the time, compare with Close-Up Mode. Therefore, I would say the main difference between these 2 Modes is the Colour.

Some model of compact digital camera will automatically switch into Close-Up Mode if you put your camera near to the target, even the target is a human being. The digital camera does not know whether it is a skin or a flower, insect, food and etc. The distance of focus determine the Mode as well. 


By the way, I do prefer to Zoom In to the target instead of getting close to it. It is because some Lens have a minimum distance and if you get too close, you will not able to focus. Also, you might disturb the target (animal, insect, or something holding on someone's hand), I believe that is not a good move. :)


Do you want to know more? Please "like" my posts ^^

Saturday 21 May 2011

Choose Your DSLR

This chapter will be updated from time to time. ^^ Let's begin.

Most newbies do not know what should they focus when they buy a DSLR. Well, I only think of one thing. 

--"What will I shoot in the future?"--

There are a lot of model and brand of camera in the market. Most salesman are telling you the same thing, or give you some advise, which do not sounds advise to me. No offence ^^.

Do you think you should buy the BEST camera, even you are a newbie now? No, you can't find or buy the BEST because the best camera DO NOT EXIST. And Yes, you should get a higher spec camera so you won't waste your money in outdated camera.

You can buy your camera online now because they deliver to your door and save your time. You still got your camera warranty even you buy it online.  Especially camera gadget and accessories, I prefer buy them online because those accessories are cheap and small, why waste my time to buy in the shop?

However, I would say the best photographer makes the camera BEST. There are still certain GOOD camera and quite popular recently. But you need to know your purpose in order to choose a SUITABLE camera for yourselves.

I make the list simple so we can see what we need to consider when we choose a camera. Of course, this is not a good review because I do not consider specific control, those depends on the user. 


What do we have today?

--Canon T2i and Canon T3i--


Lens = EF-S 18-55mm IS f/3.5-5.6
Max Shutter Speed = 1/4000
Min Shutter Speed = Bulb+30
Max Resolution = 5184*3456
Min Resolution = 2592*1728, 480*480
Pixels = 18.0M, 18.7M
Hot Shoe = Yes
Built in Flash = Yes
Video = Yes
Video Max Resolution = 1920*1080
Video Min Resolution = 640*480
Weight = 530g, 570g


To be honest, T3i and T2i are about the same. As you can see, the differences between T2i and T3i are something NOT IMPORTANT for me. For those who like higher Pixels, you gonna love T3i because it has 18.7 MPixels. Also, it can set a lower resolution to 480*480.

The price of T2i and T3i are about the same as well. But recently there are different offer and promotion, these offers make T2i and T3i different in price. :) Both camera original price around $899.00, depends on the promotion or with different lenses, I can't tell the exact price here.

However, try to order your DSLR when there are offers, it definitely cheaper and worthy compare with normal season. :)


For EF-S 18-55mm f/3.5-5.6 IS Lens,  Canon T3i got great deal now:
Canon EOS Rebel T3i 18 MP CMOS Digital SLR Camera and DIGIC 4 Imaging with EF-S 18-55mm f/3.5-5.6 IS Lens


For EF-S 18-135mm f/3.5-5.6 IS Lens,  Canon T2i got great deal now:
Canon EOS Rebel T2i 18 MP CMOS APS-C Digital SLR Camera with 3.0-Inch LCD and EF-S 18-135mm f/3.5-5.6 IS UD Standard Zoom Lens


---------------------------------------------------------------------------------------------------------
--Canon 50D and Canon 60D--

Max Shutter Speed = 1/8000
Min Shutter Speed = Bulb+30
Max Resolution = 4752*3168, 581*3416
Min Resolution = 2353*1568, 480*480
Pixels = 15.1 M, 18.0 M
Hot Shoe = Yes
Built in Flash = Yes
Exposure Compensation = -2EV to +2EV, -5EV to +5EV
Video = 60D
Video Max Resolution = 1920*1080
Video Min Resolution = 640*480
Weight = 730g, 755g

Another "about the same" camera, Canon 50D and 60D. ^^ For those who like to have video recorder, Canon 60D definitely your choice. 

But, to be honest, I would not buy a camera with video recorder because it REALLY consume battery and memory, especially HD video. 8G memory card will only last for around 30 minutes or less.

50D is an "old" camera because Canon just launch a few camera, and 50D should be 3-4 years old by now :) Still, most people will choose 50D for mid level camera. 

The price of Canon 50D and 60D are about $200 different, I'm talking BODY ONLY. Since 50D is an "old" camera, they will sell 50D with different lenses, or I would say this is some kind of "offer" or "promotion". However, depends on what you wanna shoot, choose your SUITABLE DSLR.


For EF-S 28-135mm f/3.5-5.6 IS Lens,  Canon 50D got great deal now:

For EF-S 18-135mm f/3.5-5.6 IS Lens,  Canon 60D got great deal now:

Thursday 19 May 2011

How to Use Landscape Mode?

First, you need to select the Landscape Mode at the camera Mode Dial. You might found your Dial looks different, but I'm sure you can find the mountain icon ( In red circle) at the Dial :)


So, what does Landscape Mode do? Let's begin. These are the setting for my camera, but it will be about the same as yours as well. Do not worry ^^

Aperture = Auto
Shutter Speed = Auto
Exposure = Not Available
ISO Speed = Auto
Picture Style = Landscape
White Balance = Auto
AF Mode = One Shot
AF Point Selection = Auto
Drive Mode = Single
Metering Mode = Evaluative
Built-in Flash = OFF

Do you remember the chapter "Controlling the Depth of Field"? In Landscape Mode, you can't control the Aperture because it is in Auto. But, the camera is designed to use higher f-number Aperture in order to get both close and distance object in focus.


Landscape Mode also slightly control the colour to capture the trees and sky more vividly. In fact, Landscape Mode will more concentrate on 4 colours which are Red, Yellow, Green and Blue. Therefore, if you shoot a tree, you will get a result as the tree is in vivid green.


While in Auto Mode, you will get colour like this.


By the way, one of my friends told me Landscape Mode will control Contrast as well. Contrast is also increased to give a clearer and more dimensional appearance. Well, I must admit I do not have perfect eyes, perhaps, you can load the pictures to computer and compare the data by using some relevant software ^^


Do you want to know more? Please "like" my posts ^^

Tuesday 17 May 2011

How to Use Portrait Mode?

First, you need to select the Portrait Mode at the camera Mode Dial. You might found your Dial looks different, but I'm sure you can find the head icon ( In red circle) at the Dial :)


So, what does Portrait Mode do? Let's begin. These are the setting for my camera, but it will be about the same as yours as well. Do not worry ^^

Aperture = Auto
Shutter Speed = Auto
Exposure = Not Available
ISO Speed = Auto
Picture Style = Portrait
White Balance = Auto
AF Mode = One Shot
AF Point Selection = Auto
Drive Mode = Low-Speed Continuous
Metering Mode = Evaluative
Built-in Flash = Auto

Do you remember the chapter "Controlling the Depth of Field"? In Portrait Mode, you can't control the Aperture because it is in Auto. But, the camera is designed to use lower f-number Aperture in order to make the subject isolates from the background, which is making the subject stand out more while the background is blurred.


Portrait Mode also slightly control the colour to make the skin tones lighter and softer. If the environment is too dark, the flash fired automatically to give the subject's skin brighter and beautiful look.


Do you want to know more? Please "like" my posts ^^

Sunday 15 May 2011

How to Use Auto Mode?

First, you need to select the Auto Mode at the camera Mode Dial. You might found your Dial looks different, but I'm sure you can find the Green Square icon ( In red circle) at the Dial :)


So, what does Auto Mode do? Let's begin. These are the setting for my camera, but it will be about the same as yours as well. Do not worry ^^

Aperture = Auto
Shutter Speed = Auto
Exposure = Not Available
ISO Speed = Auto
Picture Style = Standard
White Balance = Auto
AF Mode = AI Focus
AF Point Selection = Auto
Drive Mode = Single
Metering Mode = Evaluative
Built-in Flash = Auto

Auto Mode is a convenient mode for most user. According to difference environment, Aperture, Shutter Speed, ISO speeds and White Balance are all decided by the camera. Also, it is suitable for a shooting a moving object because of the autofocus. Built-in flash will pop up it the environment insufficient in light.


There is no user setting at all so anyone can take a picture, most suitable for newbie or people who help you to take photos.


Do you want to know more? Please "like" my posts ^^


Check out more DSLR and Gadgets?


Saturday 14 May 2011

Can't wait to start Shooting?

Hi, I'm not going to write technical things for today. What I want to say is ... ...Hurrayyyyyy!!!!! I already wrote ten chapters, even it is not very details or professional writing. :)

I know you already get bored because theories are theories, you need to practice, right? But, please, do me a favour. BE PATIENT. You can't run before you know how to walk. 

Let me show you something. You can skip it to next chapter by pressing HERE if you are not interested.

Actually, this is the first time I write in Blog. It seems I still able to write something afterall. ^^ I'm used to be a busy man. Everyday working from day to night, everyday repeat the same things. Hehe, that's right, who else does not work from day to night and repeating the same things everyday?

One day, someone ask me a question. 

"What are you going to do if tomorrow is the end of the world?"

I do not know the answer. Sit there and wait to die? Help someone else before the end comes, even you can't help yourselves? Spend all your money (if there is any, haha) ?

What do you think? What will you do?

Well, my ex-boss told me one thing. Do something good for your own, and others. Do not worry on how much you can do, or how much benefits you can receive. Do your Best, Show your Best, and Enjoy the Result. :)

Is that the answer, boss? Come on, you must be joking, you did not answer the question. :p

Ok, I know you can't wait to start shooting after all these chapters and theories. Let's Begin. Do you want to know more? 

Friday 13 May 2011

Understanding the number of Pixels and Sensor Sensitivity

"Do we need a higher Pixels camera?", "Image quality depends on the number of Pixels?", "Larger Sensor got higher Pixels than smaller Sensor?"...and etc. Most people ask this questions when they choosing a camera. 

One day, my friend complaint that he got cheated by the salesman because the salesman told him the model he bought is the highest Pixels in the market, at that moment. When he tried to capture sceneries, the pictures is not clear while he zoom in the LCD monitor. He tried to focus, change the Depth of Field, changing to lower of Pixels and tested with different ISO speeds and etc but the result still same, dissatisfy. 

Well, what he bought is "higher number of Pixels" but not "higher Sensitivity Sensor" ( or we called it a "Large Sensor"). I remember once awhile in the market, companies were competing for "higher Pixels" camera because most people want a "higher Pixels" instead of a "higher Sensitivity Sensor" (they might not even know what is higher sensitivity sensor). Most people thought "higher Pixels" camera is so important.

Actually, even if a smaller sensor has the same number of Pixels as a larger sensor. A larger sensor are more sensitive, resulting in a higher image quality than a smaller sensor. Therefore, higher image quality does not depends on the number of Pixels only.


Assume we have 2 same sensitivity sensors but different number of Pixels, which one will have a higher image quality? Well, of course is the higher number of Pixels. But, compare a 10 Mega Pixels in higher sensitivity sensor and 12 Mega Pixels in lower sensitivity sensor, I bet the first choice is better, for sure :)


Thursday 12 May 2011

Understanding the Mood of Pictures

Do you ever feel the atmosphere when you see the picture? Can you feel the Mood of the picture when it is captured? Well, I'm not a psychic, I can't really tell what was happening at that moment by looking at the photos :)

Mood, it is something you can't be taught, you need to feel by yourselves. But, there are theories, scientific prove, some colours have their Mood. I'm not going to show you all the theories in here, I will only show you photos.


This photo was shot in a dark room. The light was shooting from the top of the castle. I might not doing the lighting well, but I hope the castle looks "silence", "mystery", "cool" or "it looks like Tron". Also, you need to clear all the unwanted things at the background so it won't spoil the Mood.


While this photo was shooting with the Built-in Flash of my camera. As you can see, the shadow of the castle was captured, the flash fired from the front of the castle, and the castle just ... ...well, normal, nothing special, it just a 3D puzzle, it sucks ... :(

Background Shadow, it is something you do not want in the photo most of the time. But as long as you use a flash, you will capture shadow as well. So you need to find an angle to avoid the shadow being captured, at least you need to minimize it. 

Therefore, if you want to get a picture with Mood, you need to have imagination. Think and not just simply shoot with a flash because of underexposure.


Do you want to know more? Please "like" my posts ^^

Wednesday 11 May 2011

How to Focus in a Correct Way?

Although there are lot of people afford to buy a camera, there are still a lot of people do not know how to Focus in a correct way. Surprise?

Most of the people got a camera in their hand, and they keep shooting because they have a large capacitance memory card. Unlike the film camera, it is very expensive if they keep shooting the environment or stranger for no reason. No offense ^^. Then, when they print the photos or view in the large LCD television or monitor, they found some of the photos not clear or sharp enough. The reason they can't capture a clear and sharp photo because they do not Focus.


The red circle shows the Shutter Button. It is not just a normal button because this button allows you to press halfway to Focus the subject. Most camera will focus the subject appear at the center of the Viewfinder (or LCD monitor for compact camera).

Well, you might think that you have a smart and intelligent camera, you do not need to worry whether you need to Focus before capturing the picture. Maybe you really have a smart and intelligent camera, but you can have a clearer and sharper picture if you know the correct way to Focus, it worth a shot :)

So, use your index finger press the Shutter Button gently to feel the difference between "press halfway" and "press completely". By the way, when you press halfway to Focus, probably you will heard a beep sound once your camera focused the subject. Also, you can see the LCD monitor image from blur to clear because the camera is focusing the subject, and you are good to go. Easy :)


Tuesday 10 May 2011

How to Freeze motion?

Capture a clear and memorable photo is very important, whether you are a professional photographer or not. But most of the time, due to the environment, maybe in car racing, horse racing, 100 meters dash, or your kids are running, you might feel very difficult to get a sharp and clear photo. 

The main reason you cannot capture a moving object is because the Shutter speed not fast enough. You might tried faster Shutter speed but you got a same blur result. 

Let's back to the basic of camera then. :)

Do you remember "How does Camera work" ? Film and Sensor need to capture light in order to get enough Exposure. Therefore, increasing the Shutter speed does not really solve the problem. You need another thing to help you increase the Exposure, it called "Light" :)

How do you get Light? Well, Camera Flash, Fluorescent light, Sun light and etc. Or you can increase your ISO speeds as well. Why?


This picture was captured at outdoor with 1/100 sec Shutter speed. As you can see, 1/100 sec Shutter speed is not enough to freeze the motion of the fish. You can see the water splashing but it is not clear and the surface of water is not sharp as well.


This picture was captured in 1/250 sec Shutter speed. The surface of the water looks clearer compare to 1/100 sec Shutter speed. Also, you can see the fish head, sharp enough isn't it?


As long as the you get enough Exposure, you can try a faster Shutter speed. This picture was captured in 1/1250 sec Shutter speed. 


Monday 9 May 2011

Controlling the Depth of Field

What is Depth of Field? Depth of Field is the area focus of your camera, which means the distance in front and behind the focused subject. Changing the Aperture will affects the Depth of Field, larger Aperture wider the Depth of Field, and smaller Aperture narrower the Depth of Field.


When you wider the Depth of Field, you will get everything focus in the picture (Not exactly focus but will be very clear as well) . Most of the time we wider the Depth of Field in sceneries such as mountain, waterfall, jungle and etc. the grass in the front and the cloud at the back are all focus. And guess what, compact camera will automatically wider the Depth of Field ( or activate multiple focus function) most of the time, so everything will be focused.


Why do we need to narrow the Depth of Field ? We do not want part of the subjects in the picture get blur, do we?  As you can see, only the subject is focus while the background is blurred. So, it makes the subject stand out more. In some case, due to the environment, you need to blur the background because there are unwanted things such as bag, boxes and cabinet behind the subject.

Of course, you are advised to choose a better background as well :) 


Do you want to know more? Please "like" my posts ^^


Sunday 8 May 2011

How does ISO speeds work?

What is ISO speeds? ISO speeds is a setting determine the quality of picture. Do not get me wrong, quality does not equal to number of Pixels.

Traditional film camera do not have ISO speeds setting. It is a setting for digital camera's Sensor (A Sensor is a "film" of Digital Camera).  Low ISO speeds obtain higher picture quality, and high ISO speeds obtain lower picture quality.


Some digital camera have a lower ISO speeds, and higher ISO speeds up to ISO 12800.

As you can see, the picture get blurred by increasing the ISO speeds. But It is not "Blur", it is "Noise". Let's make it easier. Sensor is a device (oh god, not again...) to collect light. ISO 100 means the Sensor is a lazy guy and it collects light in slower speed. ISO 1600 means the Sensor is a hard working guy and it collects light in faster speed. 

Therefore, a hard working Sensor will collect whatever comes in, even the reflection of dust in the air. Picture with higher ISO speeds will appear white spots and probably you will think the Lens is cover by dust, so you clean it up quickly. Well, you might be correct, but it might just dust in the air.

We are surrounded by dust all the time, you just do not notice. To prove there is dust , turn off your room lights and turn on your torch light. Do you see dust right now?

Someone gonna ask why we need to set higher ISO speeds if it will gain Noise? Do you remember maximum Aperture but still not bright enough in chapter "How does Aperture work?" ? ISO speeds can help you. Higher ISO speeds work well for dark scenes. 

As I told you, a hard working Sensor collects more light. In dark scenes, you can capture a better picture, without Flash, by setting a higher ISO speeds. Also, higher ISO speeds setting save more battery than a Flash. 


This picture is captured in different ISO speeds. If you take a closer look, you will see the ISO500 is actually the clearest and got a the best texture of all. Do not get me wrong, I mean ISO500 is suitable for this picture ONLY because the brightness of environment, the object's colour, the shooting angle and etc might be the factors. Although ISO200 will reduce the noise, it does not capture the best texture. While ISO3200 does not capture the best texture as well. This also proof selecting a suitable ISO speeds will also affect the quality of picture.

However, Do Not Use ISO 6400 and above! Noise increase at this level and the texture is reduced. Most photography at this speeds is more to "document" than actually "use" the picture. 


Do you want to know more? Please "like" my posts ^^